How to add your Company logo, Engineer registrations numbers (GasSafe, NICEIC, etc) and Engineer e-signatures to your Certificates
Thanks for choosing Powered Now! This article will run you through the basic functionality of our Certificates feature (available exclusively on the Pro Tier) and how to adjust the Settings so that they work for your Business.
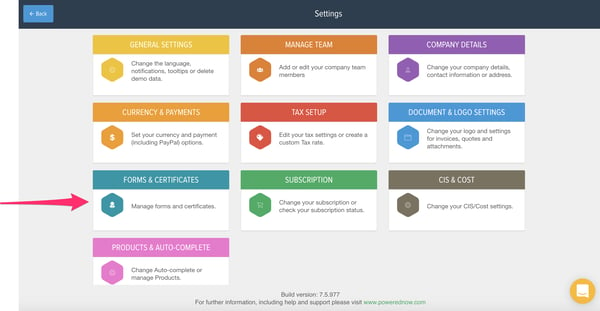
To start, let's head over to the Certificate Settings, as almost all of the Settings we'll need are there:
- Click on Settings (Cog symbol at the top right of the Powered Now home screen).
- Click on Forms and Certificates.
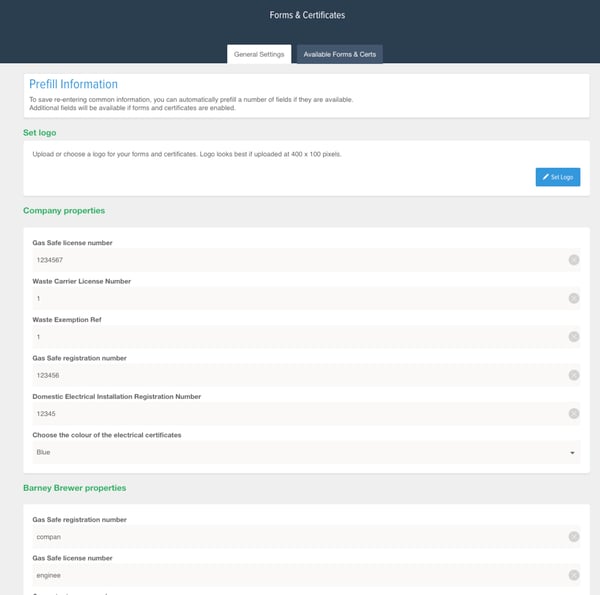
While on this screen, make sure to add any applicable registration numbers in the appropriate fields (also do this for each engineer).
To add your Company logo to your Certificates:
- Click on Set Logo.
- Follow the upload instructions.

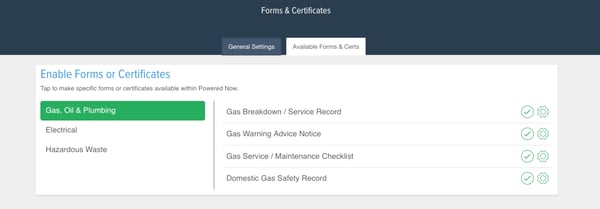
To select the forms you want to be visible in the system:
- Click on the Available Forms & Certificates tab at the top of the screen.
- Uncheck any certificates/forms which do not apply to you or your business.
- Click Save.
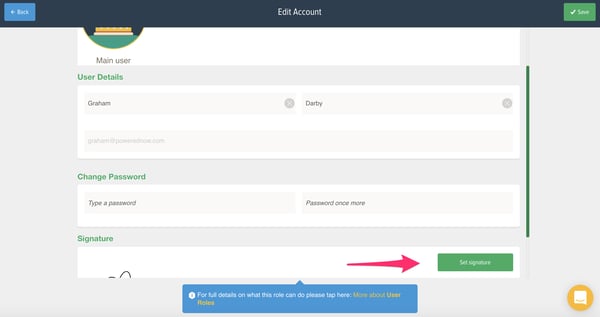
To add an electronic signature for yourself and your Engineers:
- Go to Settings.
- Click on Manage Team.

- Click on the Edit button.
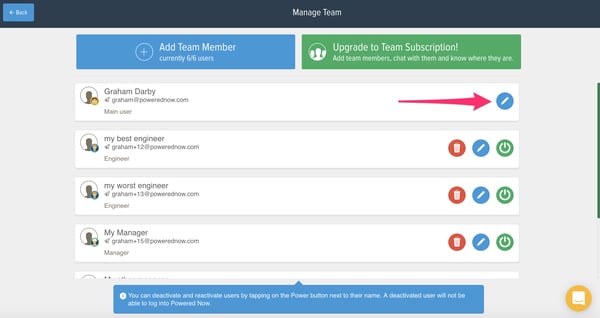
- Click on Set Signature and sign the box, then click Save. (If your desktop does not allow you to sign in the box, you can use a device to set signatures.)
You're all set! You should now be able to raise a custom Certificate for your clients with the push of a button.